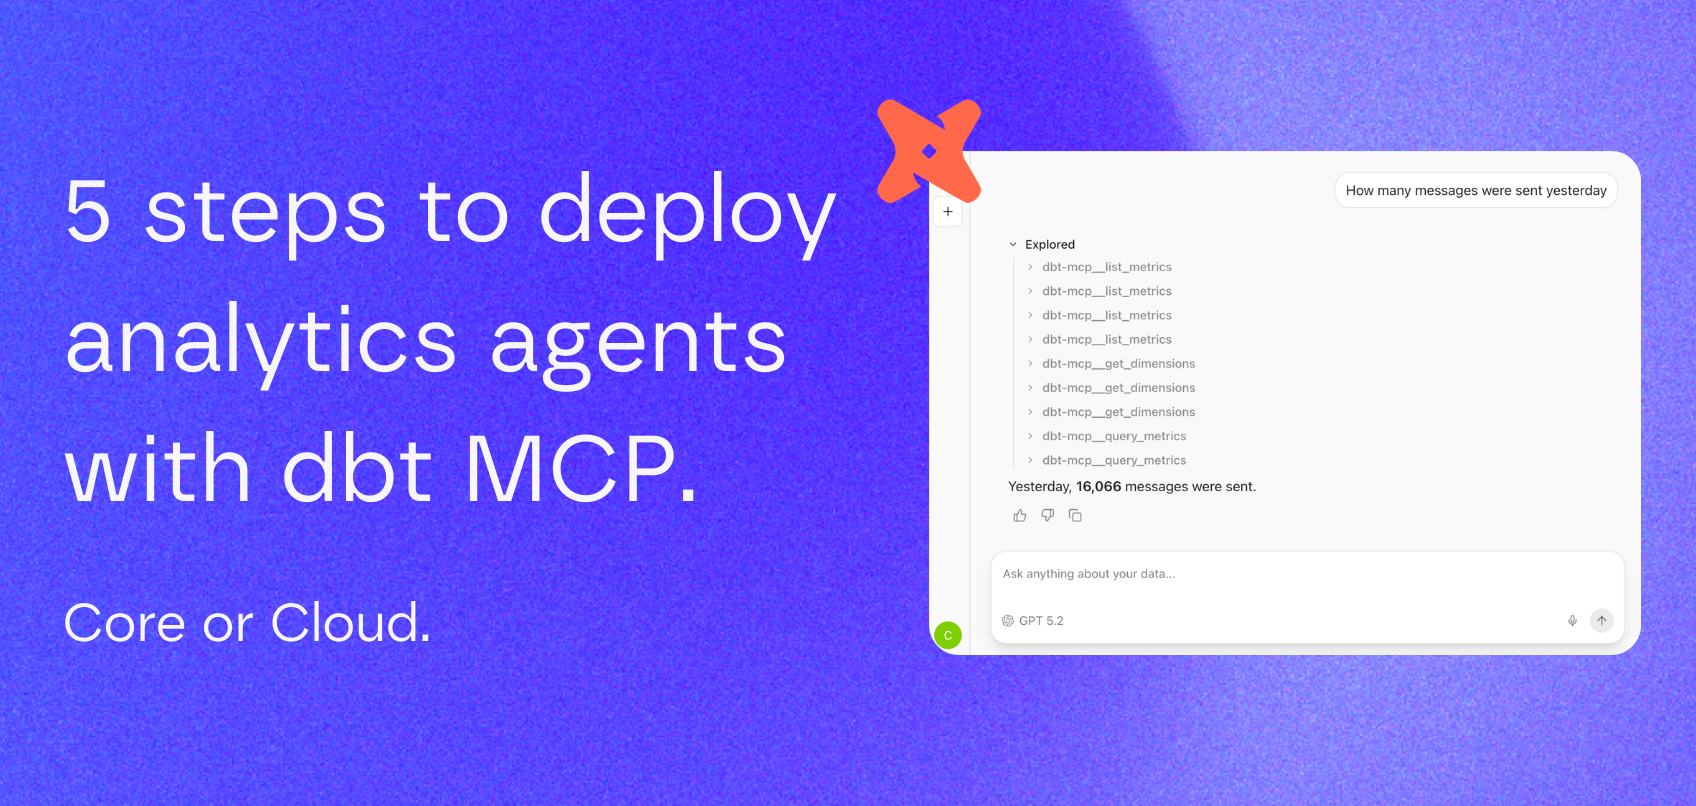
5 Steps to Deploy an Analytics Agent on dbt MCP to Your Whole Company
A practical 5-step setup guide to deploy an analytics agent on dbt MCP with nao, from choosing the right MCP to rolling out chat with data across your company.
3 March 2026
By Claire GouzéFounder @ naoLast year at dbt Coalesce, everyone was talking about the dbt MCP. Almost nobody could explain how to install it properly, what to do with it after the demo, or how to turn it into something the whole company could actually use.
That is the gap this guide covers.
The dbt MCP is great to test locally. You can wire it into Cursor, Claude, or another client and start exploring your project. But that setup does not scale. You cannot ask every person in the company to install the dbt MCP, configure auth, understand local versus remote MCP, and debug which tools are available in dbt Core versus dbt Cloud.
The better approach is to set up one repo with your dbt MCP configuration, connect it to an open source analytics agent, and deploy a chat UI so anyone can chat with data in the browser. If you are still standardizing the rest of your warehouse workflows, it helps to think about this inside the broader modern data stack.
That is what this guide walks through with nao, the open source analytics agent built for agentic analytics and context engineering.
We are going to do this in five steps:
- Choose the right dbt MCP,
- Initialize your nao project,
- Configure the dbt MCP,
- Test your analytics agent,
- Deploy to the whole company,
Step 1. Choose the right dbt MCP
First, choose which dbt MCP server and tool surface you actually want your agent to use.
There are three practical setups:
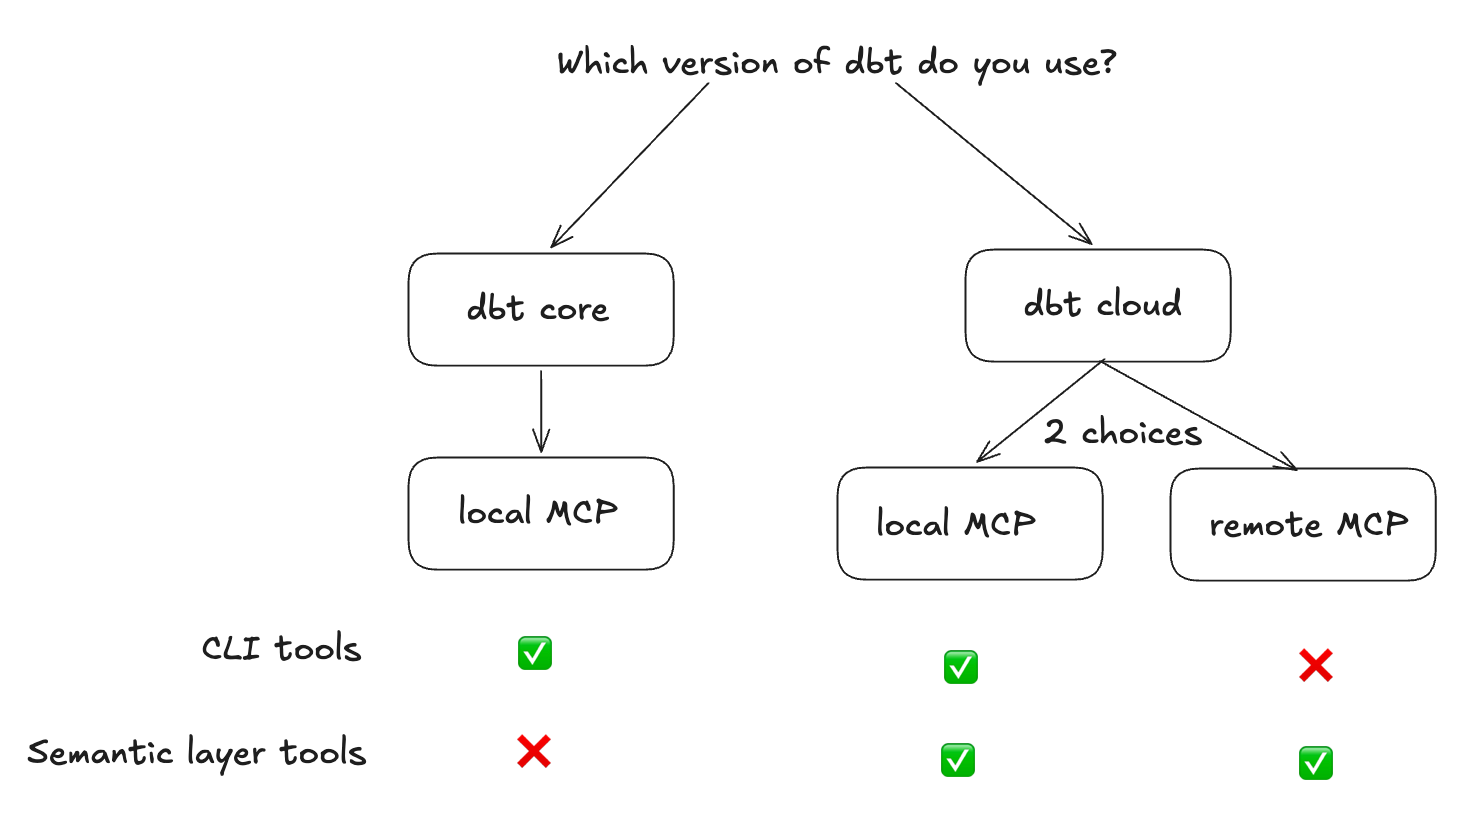
Are you on dbt Core?
Use the local MCP.
It runs on your machine or in your container and points to your local dbt project. This is the most flexible option if you want the agent to inspect models and run queries against your dbt project directly.
What you get:
- local execution against your dbt project,
- access to CLI-style dbt tools,
dbt showfor query execution,- no dbt Cloud license requirement,
This setup is the right fit if you want a flexible analytics agent that can work directly across your dbt project and broader data stack. If your team is still getting dbt foundations in place, our dbt setup guide is the right companion.
Are you on dbt Cloud and do not have a semantic layer?
Use the local MCP again.
The difference is that you configure it with your dbt Cloud API token rather than a local project path. You still use the local dbt MCP server, but the auth and project settings come from dbt Cloud.
Are you on dbt Cloud and only want to query the semantic layer?
Use the remote MCP.
In that setup, dbt hosts the MCP server. You point your client to a URL, pass auth headers, and get access to the Semantic Layer and Discovery APIs.
This model is more governed, but also more constrained:
- no CLI commands,
- no direct SQL execution,
- harder to go outside the semantic layer,
One important constraint: to use the semantic layer MCP, local or remote, you need at least a Starter license. A Developer license is not enough.
That means the free path is really the dbt Core route.
Step 2. Initialize your nao project
nao lets you deploy an analytics agent on file-system context plus any MCP you want. The core idea is simple:
- commit a repo with your agent config,
- connect your dbt MCP,
- deploy a browser UI so the whole company can chat with data,
Start by installing nao-core:
Then initialize a new project:
For a minimal setup, give the project a name and add your dbt git repo as context. You do not need to add a separate database context if your agent will access data through the dbt MCP.
This creates the file-system structure your agent will use.
If you want to sync the dbt repo into the nao project, run:
Run that from inside the new nao project folder.
If you are already sitting inside your dbt repo and only testing locally, you can skip the sync step at first.
This is the key architectural move: your analytics agent does not just get tools. It gets a versioned context layer built from your repo. That is what makes agentic analytics workable beyond a demo, and it is the same reason we keep pushing teams toward an open framework for context engineering.
Step 3. Configure the dbt MCP
Next, add an mcp.json file under your agent/mcp folder.
The exact config depends on whether you are using dbt Core or dbt Cloud. In both examples below, the dbt local server is doing the work.
dbt Core config
dbt Cloud with Semantic Layer config
The tradeoff is straightforward:
- dbt Core gives you flexibility. The agent can inspect models and use
dbt showto run SQL. - dbt Cloud Semantic Layer gives you more governance. The agent works through metrics and dimensions instead of raw SQL.
If your goal is a broader chat with data assistant over a technical data stack, Core is usually the easier starting point. If your goal is tighter control, the semantic layer is safer.
Step 4. Test your analytics agent
Once the MCP is configured, start the chat UI from your nao project:
Then open the admin panel and go to Project > MCP Server.
That is where you verify that the dbt MCP is connected and see which tools are active. You can also toggle tools on and off there.
What you should expect:
- dbt Core: 11 tools active,
- dbt Cloud Semantic Layer: 6 tools active,
Then start a first conversation in the UI.
The behavior is different depending on your setup.
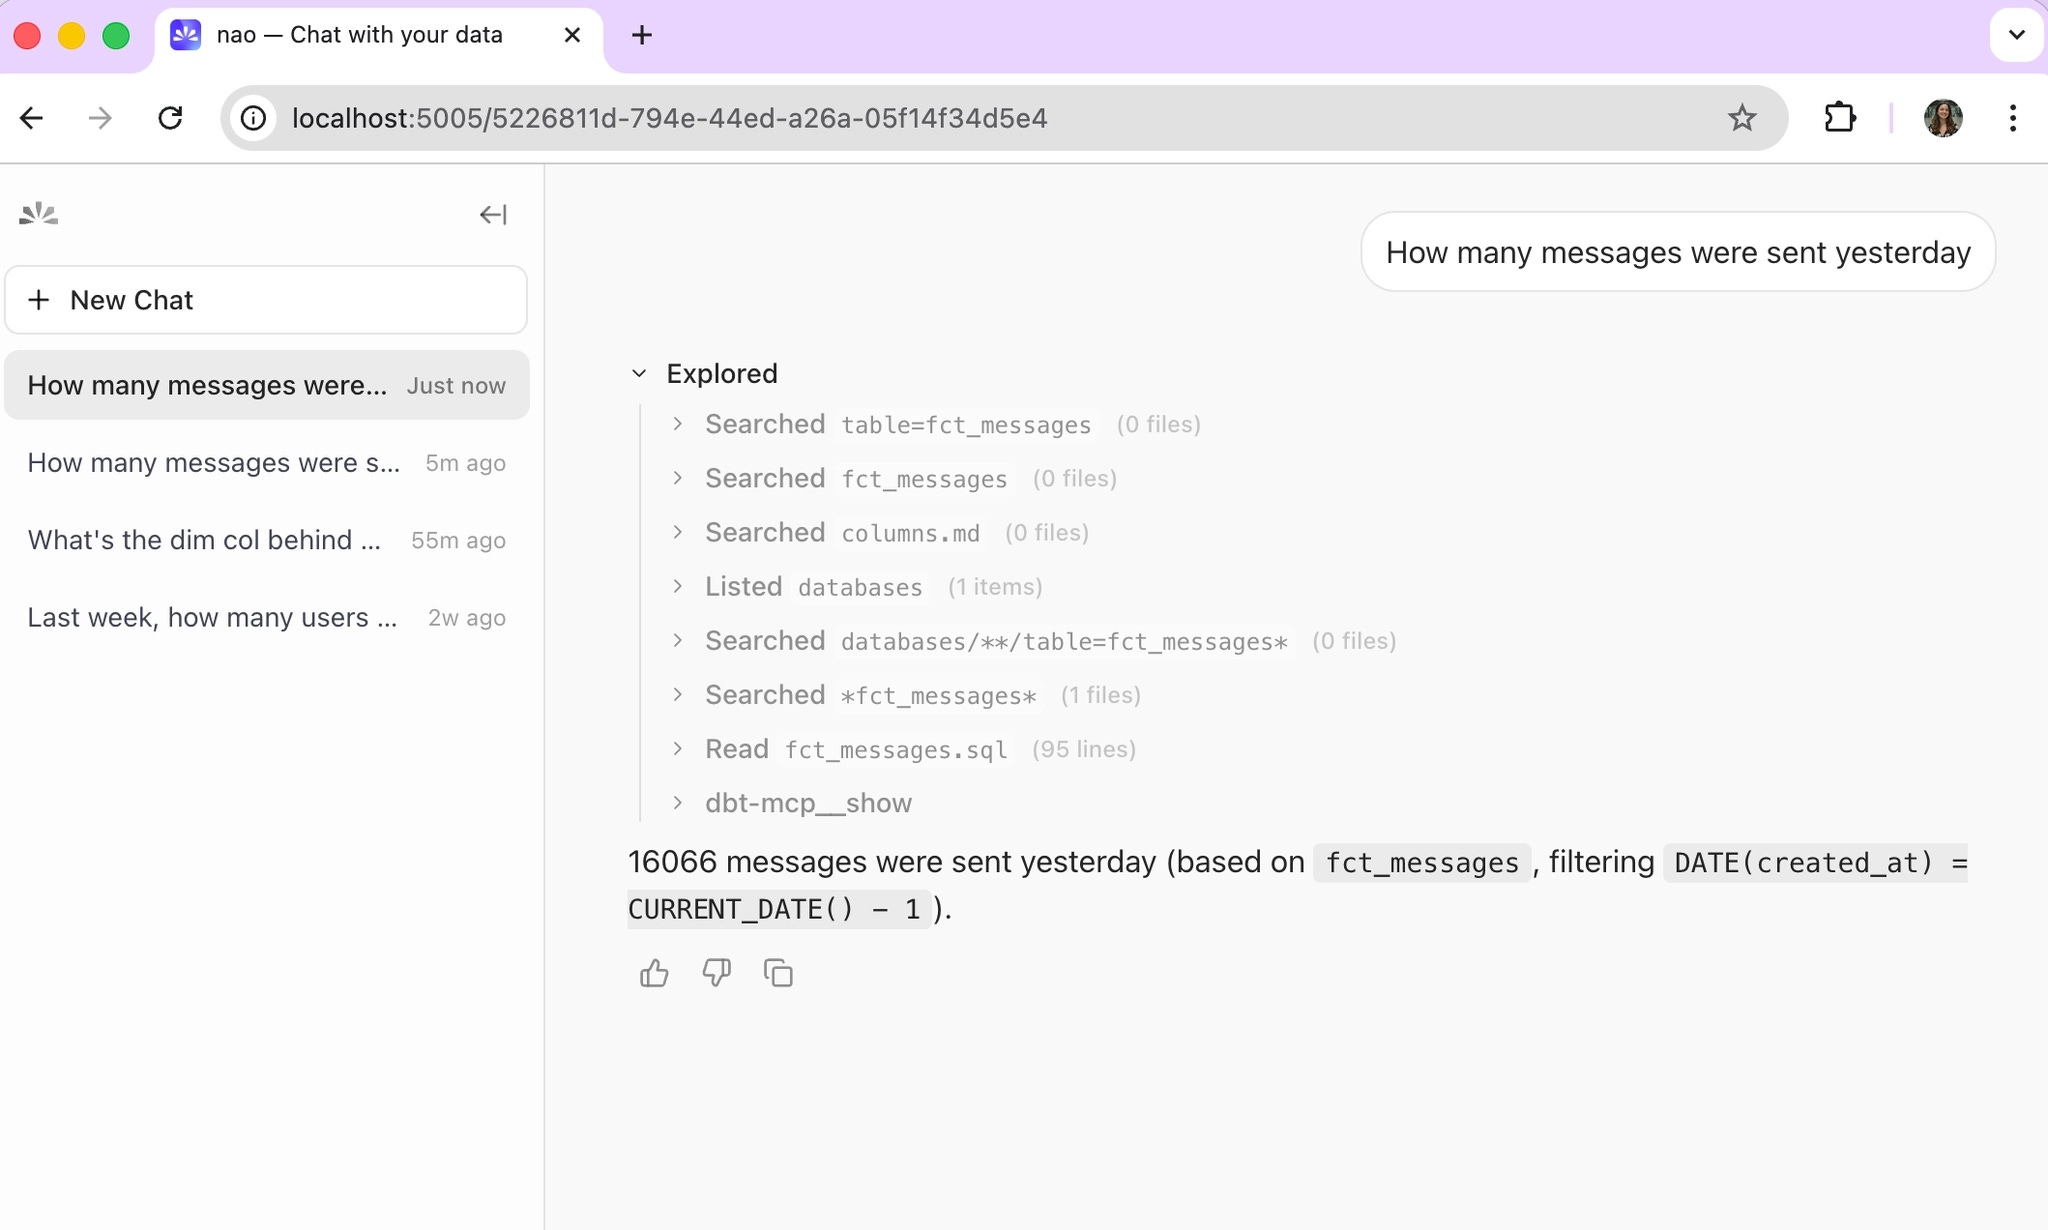
If you are using dbt Core
The agent uses dbt_show to query your models directly.
That means:
- it can generate SQL,
- it can inspect your dbt project,
- it can work more freely across the project,
This is powerful, but it is less governed.
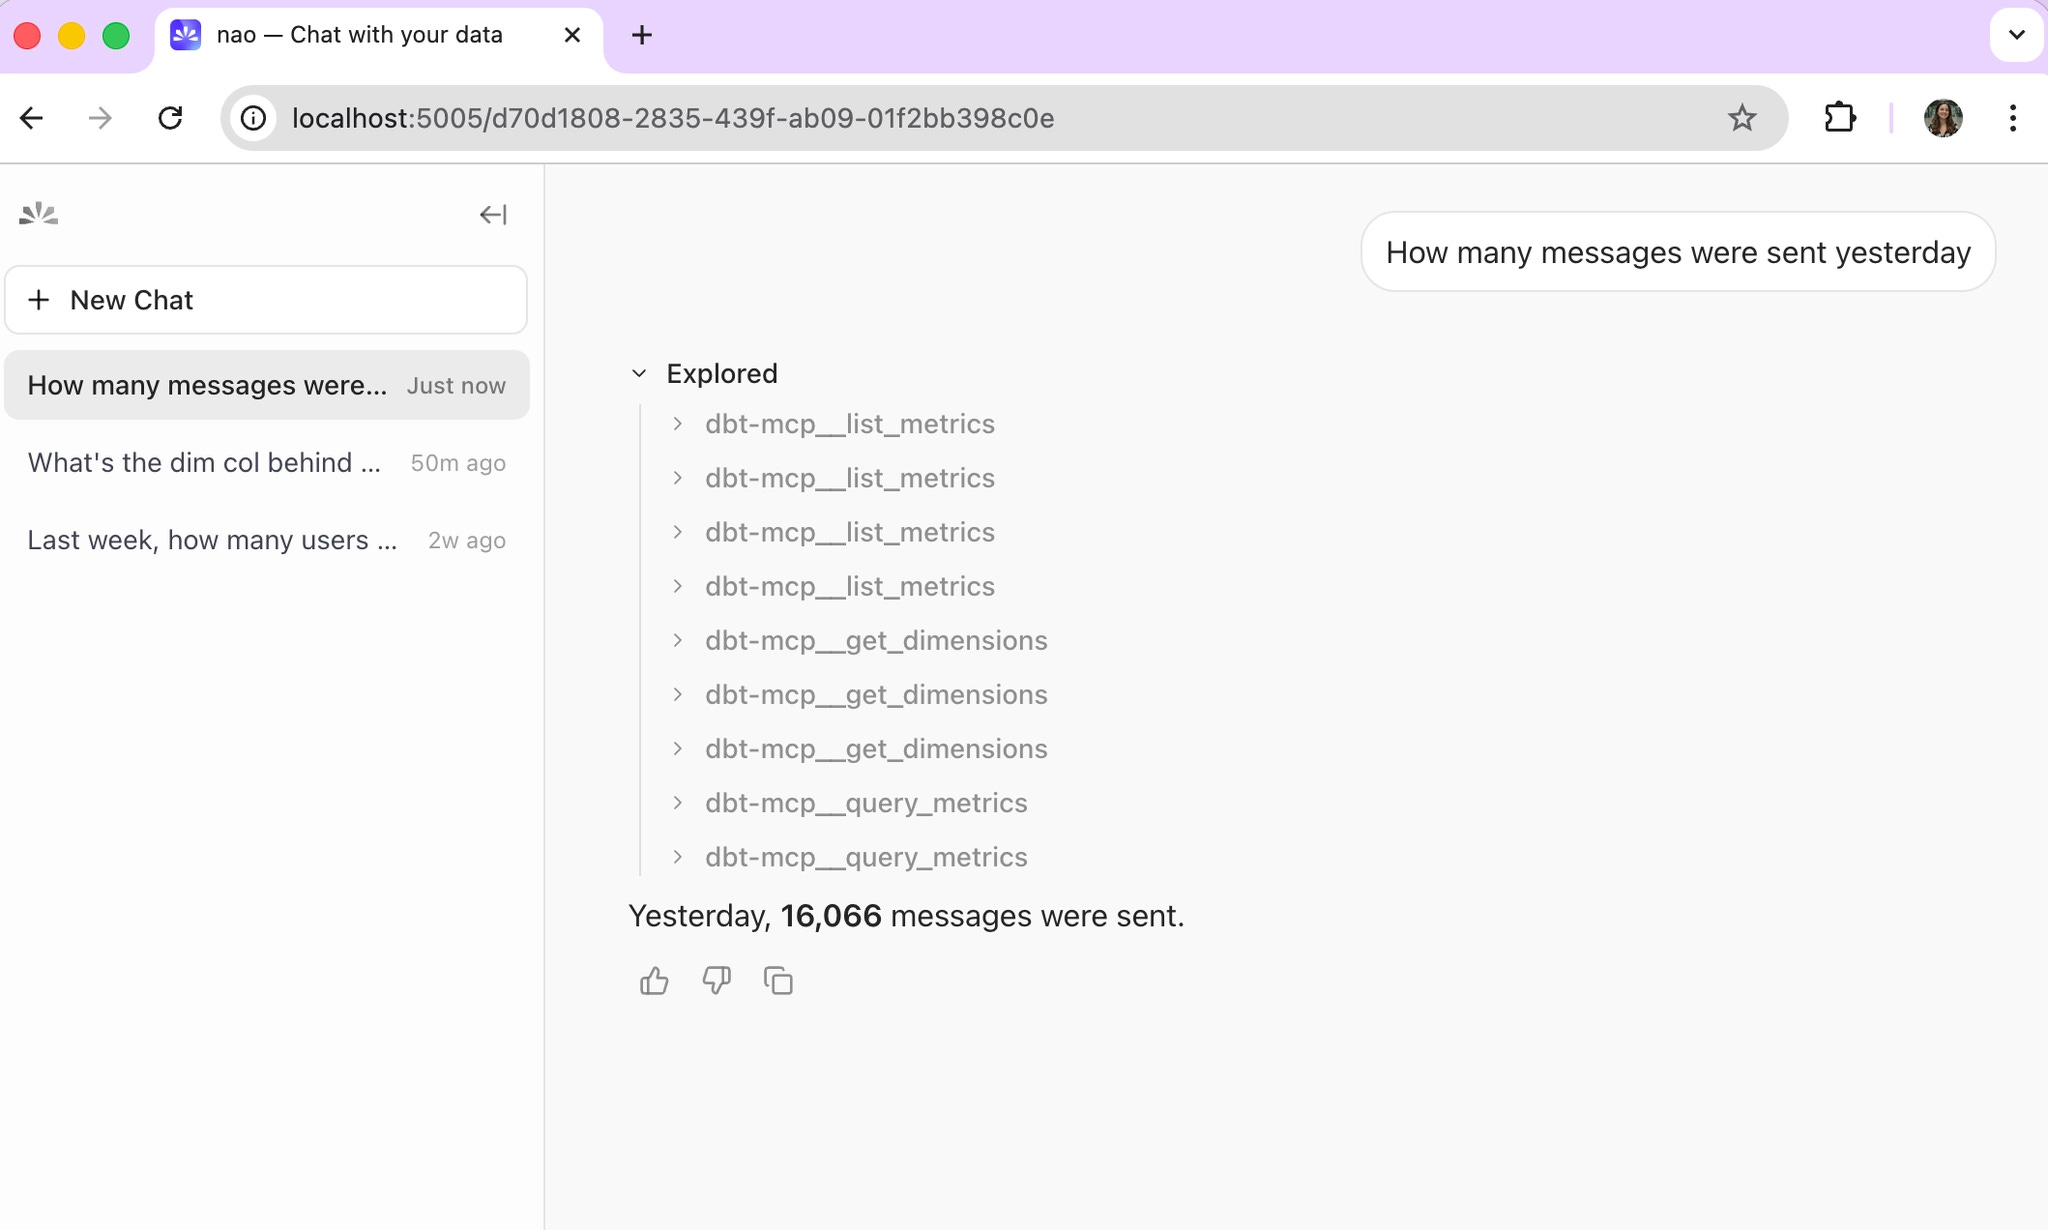
If you are using dbt Cloud Semantic Layer
The agent retrieves dimensions and metrics through the semantic layer.
That means:
- no direct SQL,
- no raw model access,
- answers constrained to the metrics your team has defined,
This is more reliable, but more limited.
That distinction matters a lot in agentic analytics.
Core is flexible. Semantic Layer is constrained. One behaves more like an exploratory analytics agent, the other more like a governed business-facing interface. If you want a more formal way to validate that tradeoff, the workflow is the same as in our guide to evaluating an analytics agent with nao test.
Step 5. Deploy to the whole company
Once the local setup works, deploy and self-host the nao agent for the rest of the company.
The pattern is simple:
- one repo,
- one YAML or config-driven setup,
- one deployed UI,
- the whole company can chat with data,
If you are using the dbt Core MCP, update the mcp.json paths to point to locations inside Docker:
Then install dbt inside the container:
In your container setup, mount profiles.yml as a secret.
If you are using the dbt Cloud MCP instead, you just need to pass the MCP variables as environment variables in the container.
That is the point where the setup stops being a local dbt MCP experiment and becomes a real company-facing analytics agent deployment.
What to do after the MCP works
Getting the dbt MCP connected is the start, not the finish line.
Out of the box, the dbt MCP gives your agent tools. It does not give it enough knowledge to be consistently reliable.
That is where context engineering matters.
The next investments are usually the highest leverage:
- add more context sources such as internal docs, Notion pages, and metric definitions,
- run
nao testwith 10 to 15 real questions to measure reliability early, - improve your dbt model docs, column descriptions, and metric definitions,
This is the part many teams miss. They focus on the MCP connection and ignore the context layer. But if you want a reliable open source analytics agent on top of dbt, your context matters as much as your tooling. We have seen the same pattern in our benchmark work on which context has the most impact on analytics agent performance.
The dbt MCP gets you connected. Context engineering gets you to trustworthy answers.

Claire
For nao team
Related articles
product updates
We're launching the first Open Source Analytics Agent Builder
We're open sourcing nao — an analytics agent framework built on context engineering. Here's our vision for what comes after black-box BI.
product updates
Launching nao automations
Schedule your nao analytics agents to run in the background. Recurring reports, conditional alerts, and a new Feed to track all agent activity.
Buyer's Guide
LangChain vs Wren AI vs nao: which open-source tool for agentic analytics?
Three open-source projects for agentic analytics, tested on the same BigQuery question. Setup, accuracy, context approach, and which to pick.